
High Dynamic Range (HDR)
This guide shows you how to set up HDR and how to tell whether HDR will actually improve your point cloud.
HDR captures the scene at several exposures and combines them. Bright and dark surfaces can thus both be measured in a single capture. That makes it powerful in the right scene, but it is not a fix for every missing point.
The problem we are solving with HDR is too much dynamic range, which is the difference in brightness between the brightest and the darkest parts of a scene. A camera can only capture a limited range in one exposure. If the scene’s range is larger, you have to choose: a short exposure keeps the bright parts but turns the dark parts black, and a long exposure keeps the dark parts but turns the bright parts white.
If points are missing for reasons other than the dynamic range, HDR will not bring them back, and it will make each capture take longer.
Will HDR Help in My Scene?
Before you enable HDR, spend some time finding out why points are missing. This quick test tells you:
Capture the scene with a short exposure. Note which areas now have points.
Capture again with a long exposure. Note which areas now have points.
Compare. If every area you are interested in gets points in at least one of the two captures, but never all of them in the same capture, your problem is dynamic range. HDR is very likely to help.
If some area has no points in either capture, the cause is something else. HDR will not fix it.
HDR is a good fit when the scene mixes very bright and very dark surfaces, for example shiny metal parts next to black plastic or rubber.
HDR will not help when the pattern does not appear on the surface. Transparent objects and very dark, light-absorbing materials do not return the projected pattern at any exposure. It also will not help with large, severe reflections. A mirror-like surface that reflects the projector straight into one camera produces data that no exposure can fix. Changing the camera angle usually helps more.
Set Up HDR
We show the steps for NxView and Engage.
1. Open the camera and turn off legacy compatibility mode, if enabled. Opening a camera with an old config runs in compatibility mode. If that is the case, you will see a Use Quantiles button in the Capture tab. Click it to turn off the compatibility mode.
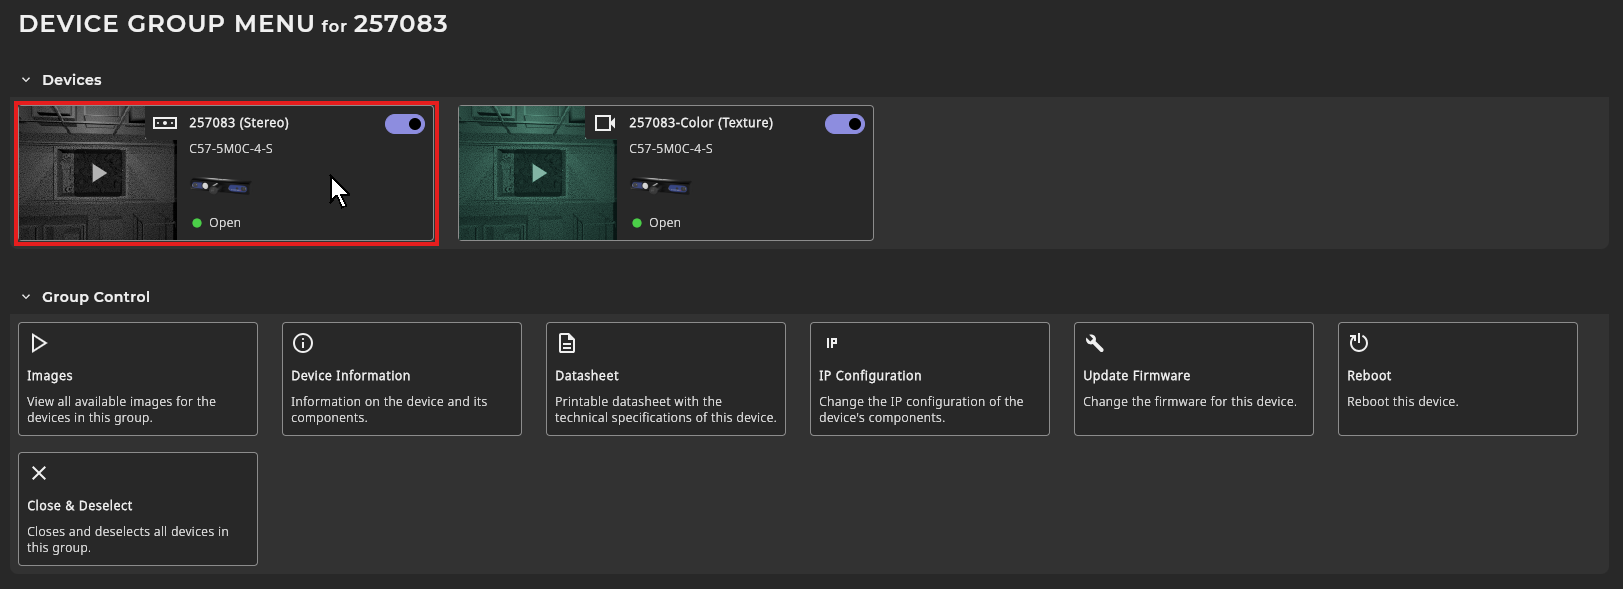
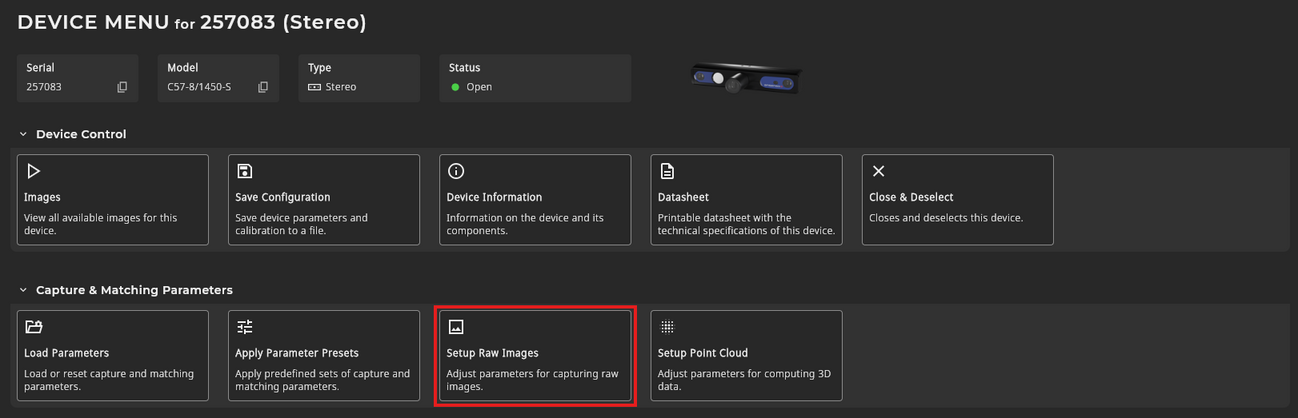
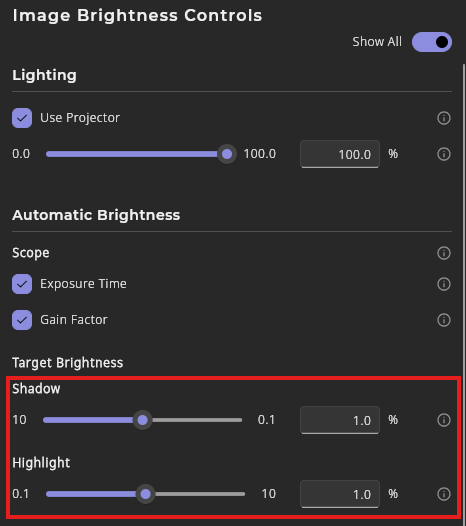
In Engage, opening a camera takes you to the device group menu. Select the stereo camera on the left. You will get to the device menu. Select Setup Raw Images to get to the settings used in the steps below.
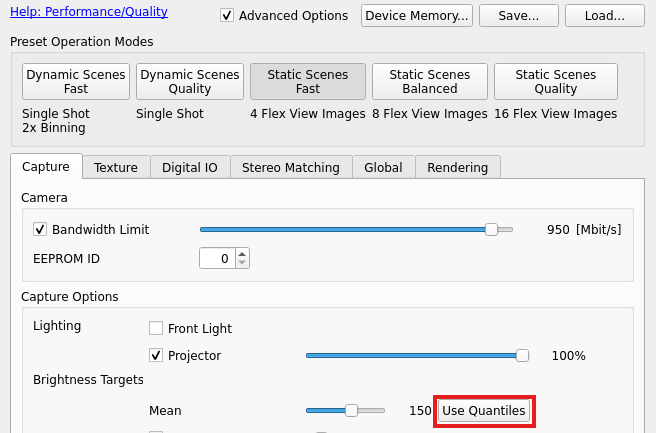
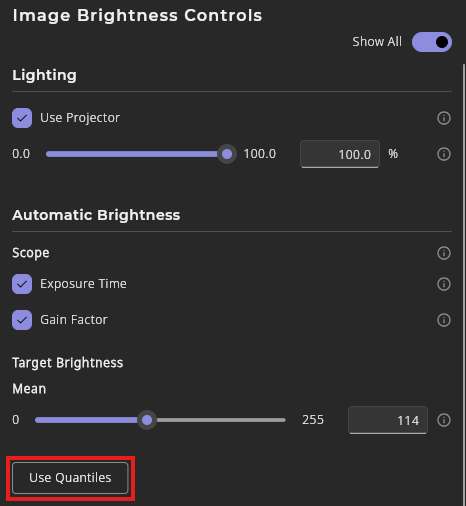
After you click it, the Shadows and Highlights sliders replace the Mean slider. For the rest of the session, a “Use Mean” button stays available.
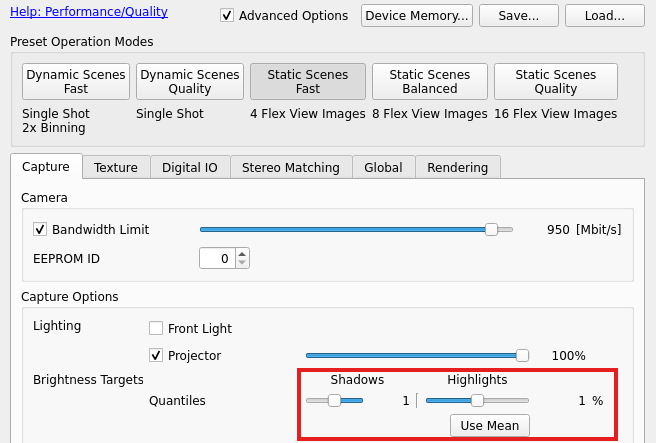
2. Keep in mind that enabling HDR makes the camera ignore the multi exposure factor. HDR and MultiExposureFactor are mutually exclusive. Enabling HDR disables multi exposure factor. To use multi exposure factor again later, turn off both Auto HDR and HDR Enabled.
3. Enable Auto-HDR. It is off by default. Tick “Automatic” in the HDR section (High Dynamic Range in Engage). The “Enabled” button and “Split” number picker will grey out, meaning the auto exposure algorithm automatically determines them.
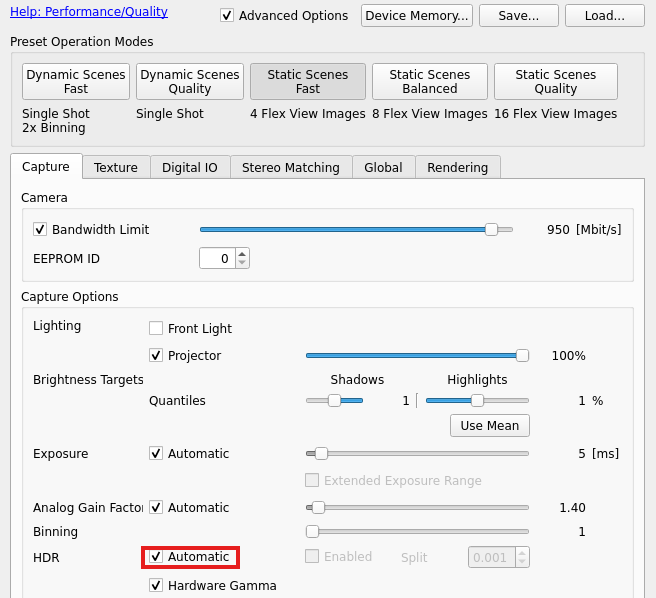
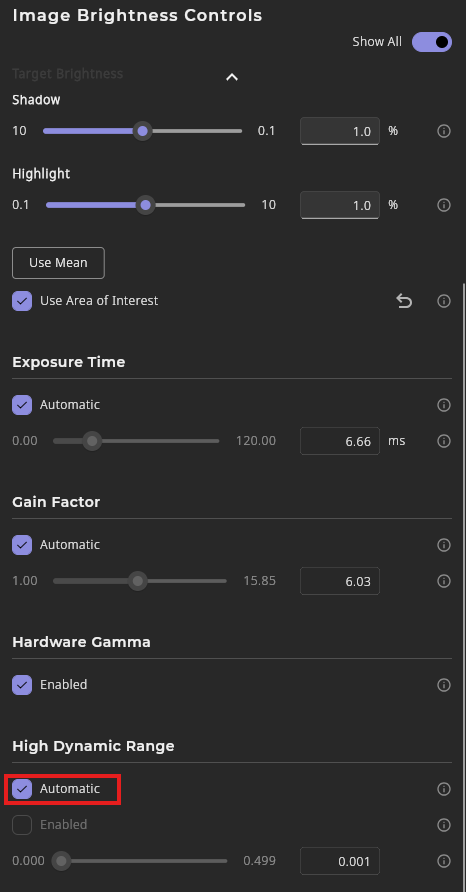
Let the camera capture a few images. The HDR algorithm then adjusts itself: it turns on Enabled and changes the Split from its starting value.
Note
It is possible that Enabled stays off and Split does not change even though “Automatic” is ticked. This means that the auto exposure algorithm determined that no HDR is needed for the current scene.
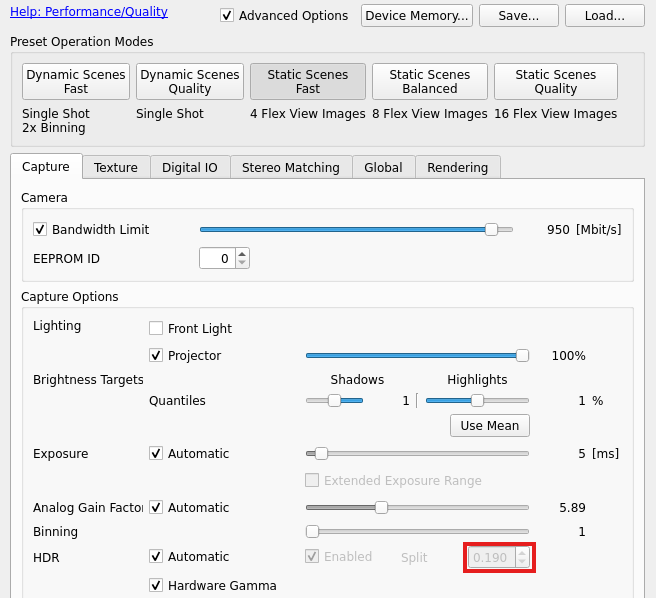
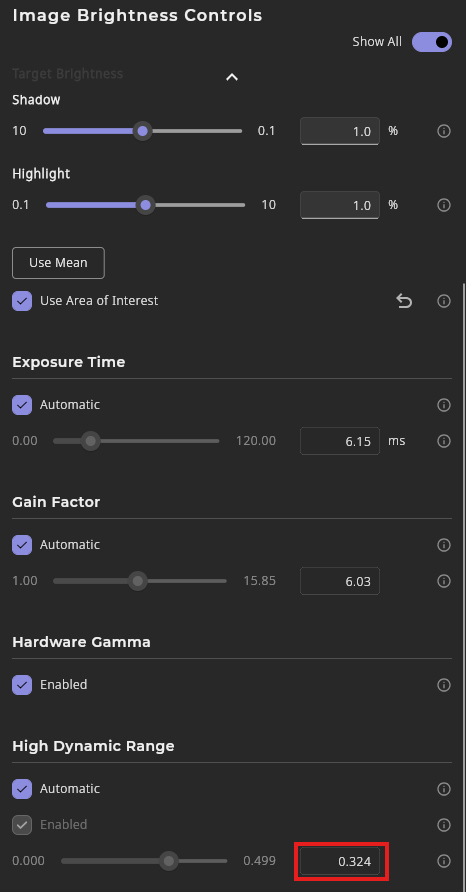
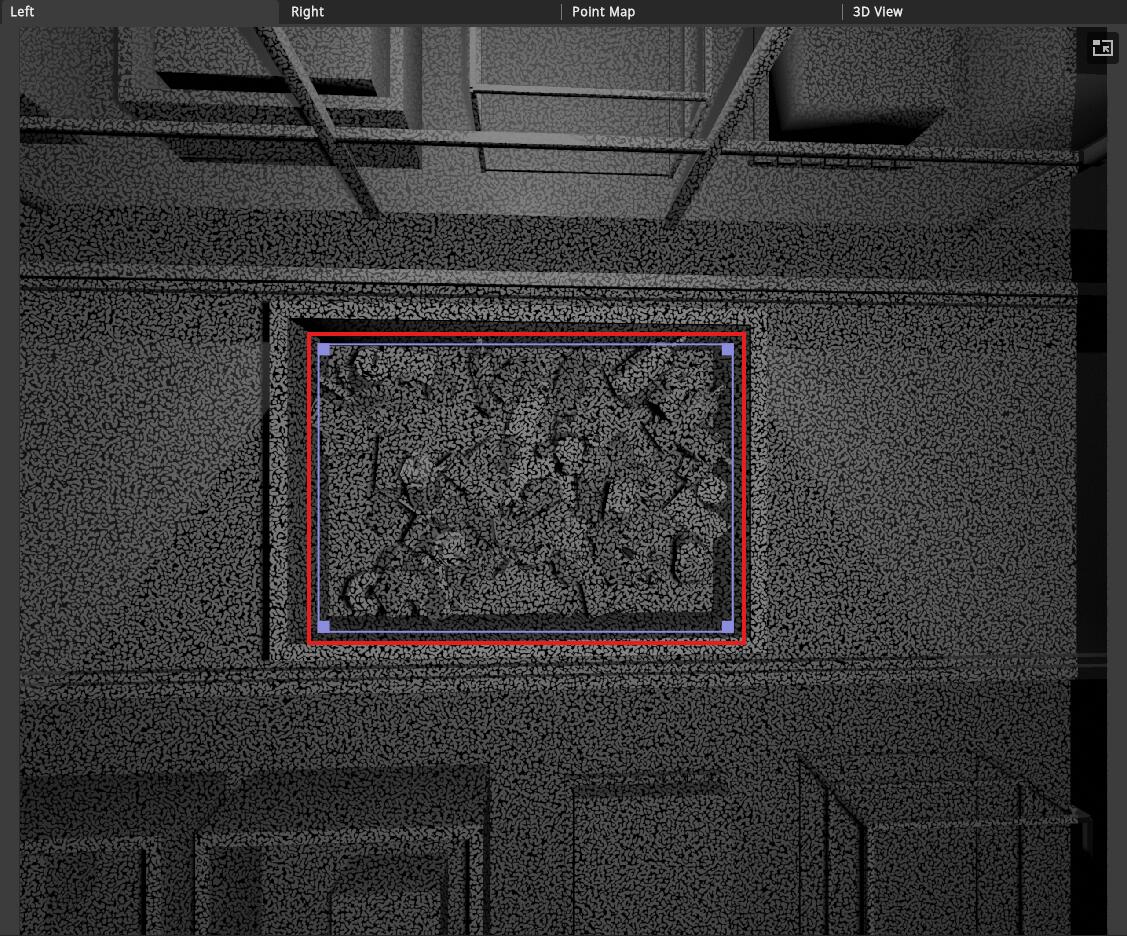
4. Set the auto exposure AOI in Engage (not available in NxView). Draw the area of interest (AOI) around the region where you need points. HDR then optimizes for that region only.
5. Tune the Shadows and Highlights Sliders. HDR is now running. Use the two sliders to fine-tune it. For both, left makes the image darker, right makes it brighter. The sliders control the Shadow and Highlight quantiles of the automatic brightness control.
If areas of the image are overexposed (pure white, no detail), move Highlights to the left. If areas are underexposed (pure black, no detail), move Shadows to the right.
Tips for tuning:
Judge by the point cloud, not by how nice the image looks.
Change one slider at a time and observe what each move did.
Compare against HDR off. Capture the same scene with HDR disabled. If the gain in points is small, the extra capture time may not be worth it.
Still Missing Points?
If you have tuned both sliders and the holes remain, the cause is most likely not dynamic range. Work through these checks:
Look at the raw camera images in the holes. Is the projected pattern visible there? If not, the surface does not take the pattern, and no exposure setting will change that.
Look for reflections. Bright spots or mirrored scene content in the holes point to specular reflections. Tilt the camera or the object by a few degrees.
Turn HDR off again. If HDR did not clearly improve your point cloud, disable it to keep the faster capture time.